Ever wondered how to make yogurt in an instant pot ? Or even if it is possible? Yes we wondered too because when you think of a pot, you think heat. So how can one make yogurt in a pot?
Thankfully, an instant pot is this “magical’ appliance that helps you work wonders in the kitchen. Check out our post in how to use an instant pot for more information.
Although not all instant pots come with a yogurt setting, most of them do. It is this yogurt setting that enables the instant pot to heat the milk to desired temperature and then keep it at the right temperature for the period of incubation.
Yes there are many methods of making yogurt but instant pot yogurt is a hit with many homemakers. Need I tell you why? Well we know that the instant pot makes short work of processes and doesn’t require babysitting like other manual kitchen appliances.
So for the busy mom or homemaker who wants to indulge in the yummy goodness of homemade yogurt, an instant pot is a blessing!
That said why would anyone even want to go through the trouble of making yogurt at home instead of just dashing to the store and picking up a pack or two?
There are a number of reasons why people make their own yogurt and they include the following:-
- The taste of homemade yogurt beats that of store bought on all counts. It is creamier and less tangy than the ones sold in stores. And you don’t need to add sugar!
- Homemade yogurt is not as costly as store bought; in fact they cost 50% less to make.
- You can be sure of what goes into the yogurt.
The above reasons are why you need to know how to make yogurt in instant pot by yourself.

How To Make Yogurt in An Instant Pot – The Basics
In making your instant pot yogurt, you can use two methods and these are the Boil method and the Cold Start method. Both methods would give you the desired result; the difference between the two methods is the startup time and the type of milk that you can use.
The Boil Method
With this method, you can use any type of milk to make your yogurt. But you would need more time and a probe thermometer. The fact that you can use any type of milk for this method, makes it a more acceptable method for most folks.
But before we go on to the steps for both methods, let’s briefly talk about the second method.
The Cold Startup Method
Yogurt made with this method is also called Fairlife or No Boil yogurt. It doesn’t use all types of milk; the milk use must be either flash pasteurized, ultra pasteurized or shelf stabilized. You can also use powdered milk.
These categories of milk is the required milk because in this method, you wouldn’t have to heat the milk. You have to begin with milk that have been boiled already to kill any bacteria.
Although these types of milk may be difficult for some people to get or be more expensive, they save you as much as up to one hour of time in preparation. And that is why the cold start method of making yogurt in an instant pot is gaining popularity.
Additionally, some people argue that yogurt made with this method is usually tangier and thicker from the start than with the boil method. But the truth is that you can always achieve that with a longer incubation time in the boil method.
How To Make Yogurt In An Instant Pot – Equipment and Ingredients Needed
You’ll need the following for homemade instant pot yogurt
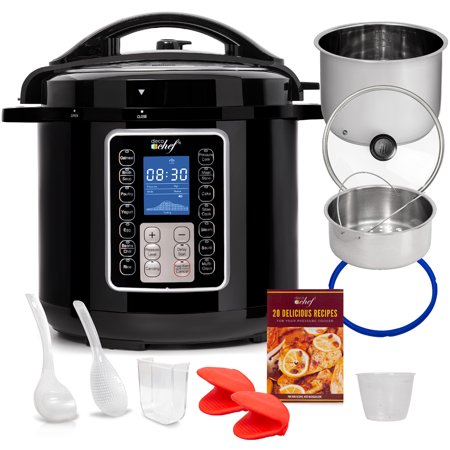
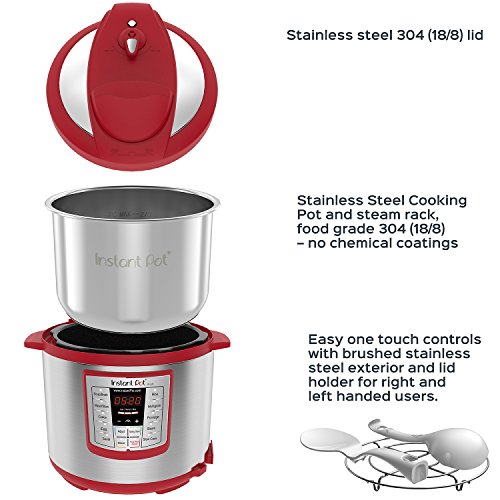
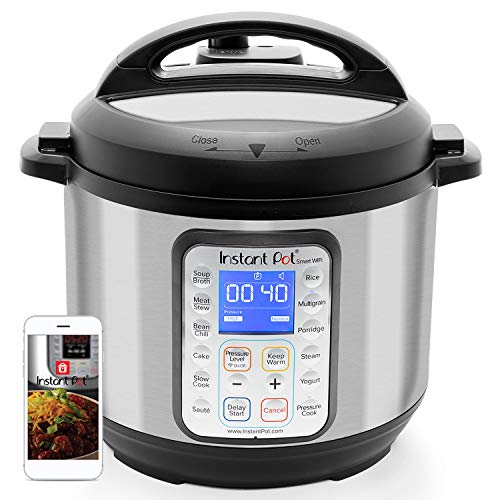
Instant Pot (most naturally)
Measuring cups and measuring spoons
Strainer and Cheesecloth (for Greek yogurt)
Yogurt starter or prepared yogurt (ensure the prepared yogurt contains live and active cultures)
Instant pot yogurt cups and rack ( if you want to use them)

How To Make Yogurt in An Instant Pot With The Boil Method – Steps
As you prepare to make your yogurt, one factor to bear in mind is that it is a time consuming process. So you have to have enough time on your hands; it’s not something that you’ll do on a whim.
Now on to the steps!
Ensure That Your Pot Is Clean
You might be wondering how that can even be a step as you feel everyone should know that you prepare food with a clean pot. Yes; but what we are talking about here is not just cleaning but sanitizing the pot (that’s the inner pot).
This is a simple step that involves using boiling water to rinse out the pot. Although you can skip this step, it’s best you don’t because it impacts on the taste of the final product.
Some people love to use white vinegar and water to rinse out the pot and dry before using; that also works.
Consider Using A Separate Sealing Ring For Your Pot
If you read our article on how to use an instant pot, you would see that we advised that you have two sealing rings and an extra (like a spare tire in case any one of the sealing rings is damaged).
The reason for this advice is that the sealing ring of an instant pot is made with silicone and we all know that silicone absorbs smell and taste. So if you use a sealing ring in your instant pot when cooking savory dishes such as chili or chicken stew, be sure that it would absorb the scent and taste of these dishes. Now imagine how that would impact upon taste of your yogurt.
So the simple solution is to have separate sealing rings for savory dishes and bland ones such as yogurt.
Heat the Milk In The Instant Pot
Pour whatever quantity of milk your recipe calls for into the instant pot and cover the pot. You can set the lid to seal or not at this point. Press the yogurt button on your pot and then the adjust button until it gets to the boil function.
When the instant pot alerts you that it’s done, remove the cover of the pot and test the milk with a kitchen thermometer to be sure that it has reached 180°F.
If for any reason the milk did not get to 180°F when the instant pot alerts to that time’s up, you can close back the lid of the pot and set the pot on slow cook for another 15 minutes. That should get it to the desired temperature.
You can leave the inner pot in for about 5 minutes before removing it from the instant pot. This would enable the yogurt to thicken more.
Allow the Milk To Cool
Leave out the milk on your countertop to cool down to a temperature between 105 to 115 °F. This would take about an hour.
However, if you want the milk to cool faster, you can place the inner pot inside a larger mixing bowl with ice water. This can save you 40 minutes or more.
Skim The Top Of The Milk
As your milk is cooling, it would form a skin on the surface. So after the cooling period, you would have to remove the skin from off the milk. This would ensure that your yogurt is as creamy as possible.
Add The Yogurt Starter
After you have skimmed off the skin from your milk, it’s time to add the yogurt starter. You can also use already prepared yogurt for this step.
Note that if you choose to use already prepared yogurt, it has to be unsweetened and have live and active cultures.
Your homemade yogurt would not work with sweetened yogurt or one that doesn’t have live and active cultures.

Incubate The Yogurt
Final step to making your instant pot yogurt is to allow the yogurt to incubate. You do this by placing the inner pot back into the instant pot and cover the pot. It doesn’t matter which way the lid of the pot is set.
Press the yogurt button and adjust until it reads 8 hours. Then leave the pot and let the countdown begin! If you want a tangier and thicker yogurt, you can add 2 more hours to the time.
When the time is done, bring out the inner pot with the yogurt and cover loosely with a plastic wrap and chill overnight or for 4 hours. This would produce a slightly thicker yogurt.
Finally, scoop your yogurt into an airtight container and refrigerate. This can last up to two weeks in the fridge.
Greek Yogurt
If you want the Greek yogurt variety, still follow all the steps for preparation of the regular yogurt. Then when the yogurt is ready, line a large strainer with cheesecloth and place over a large mixing bowl.
Pour the yogurt into the strainer and leave to drain overnight. On the following morning, scoop the thickened yogurt into airtight containers and refrigerate.

How To Make Yogurt In An Instant Pot With The Cold Start Method
For this method we’ll give you an exact recipe but constantly bear in mind that what is Important with nay recipe is understanding the proportion in which to have all your ingredients.
Before we start, please note this:
You can use ultra-pasteurized milk to make your cold start instant pot yogurt , but to get the best result; that is yogurt that is thicker and creamier than regular, it’s best to use ultra-filtered milk.
There are many brands of ultra-filtered milk but the most popularly used brand is the Fairlife brand. Some people even call the cold start method of making instant pot yogurt ‘the Fairlife’ method. That’s not to say that other brands wouldn’t work equally as well; it just a matter of what has been tested, tried and proven,
Now why the fuss about ultra-filtered milk? Ultra filtered milk is pasteurized milk that has undergone a special method of filtration. This method results in milk that has 50% more protein than regular milk, 30% of calcium and also half the sugar. In addition to this it is lactose free. Good news for lactose intolerant folks!
At the end of the day, your end product (yogurt) is thicker and creamier and also laden with higher percentage of calcium and protein and less if sugar
That said, this recipe may stand as a guide for you and if you love experimentation, you can always tweak it to suit your taste by using different kinds of milk (read our expert tips if you want to go this route). But for the safe cooks out there, this would work fine at all times, you can double, triple or multiply the recipe as required: –
Ingredients Needed
52 FL oz. or 6 ½ Cups or 1.5 liters of Milk (Ultra Pasteurized)
2 Tablespoons Already Made Yogurt (with live cultures) or Store-bought yogurt starter
Steps For Preparation and Incubation
- Mix one cup of milk with the 2 tablespoons of yogurt starter combining very well.
- Pour the remaining milk into the inner pot of the instant pot and add the one cup of milk with the starter.
- Cover your instant pot and press the yogurt setting. When you hit the yogurt button it should read 8 hours (8:00). Make sure that the ‘normal’ button lights up. If it is the ‘low’ button that is lit up, you have to change it to ‘normal’ so that you’ll get the normal heat for the yogurt to be incubated. (Keep hitting the yogurt setting until the ‘normal’ lights up).
- Leave the instant pot to work its magic.
- When the 8 hours is up, bring out the inner pot(with the yogurt in it of course lol) from the instant pot and cover with a plastic wrap.
- Place in the fridge for an additional 8 hours.
This recipe was adapted from https://amindfullmom.com/instant-pot-cold-start-yogurt/
Remember that you can set the incubation time to as long as 12 hours. The longer you set your instant pot yogurt than 8 hours, the tangier the end product would be.
Expert Tips
Types Of Milk And How To Use Them
The go-to milk to make instant pot yogurt for most folks is whole milk. But like we mentioned earlier, you can use any type of milk for the boil method yogurt.
If you want to use milk with lower fat such as skim or nonfat milk, then bear in mind that you’ll need a thickener such as half and half, heavy cream or nonfat powdered milk. You’ll find recipes that would give you suggestions on the quantity to use.
You have to be very careful if you choose to use nondairy milk. The flavor and thickness of your end product would depend on the type of milk you use and the starter yogurt.
So to reduce your learning curve for using nondairy milk, we suggest you use a recipe that calls for nondairy milk. This would help eliminate a lot of guess work for you and reduce you trial and error experiments.
Enhancing The Flavor And Texture Of The Finished Product
There are so many ingredients that can be used to enhance the flavor and texture of homemade yogurt. Some of these ingredients include sweetened condensed milk, heavy cream, vanilla extract or other food flavors.
If you love sweetened yogurt, you can add sweetened condensed milk to your yogurt. This enhances the sweetness of the yogurt without making it grainy. You can experiment with a whole plethora of food flavors and add-on ingredients. There are so many recipes that people have tried out. Just type in homemade yogurt with add-on ingredients or add ins and you’ll have many recipes to choose from. You can also add maple syrup, honey or sugar as desired.

For Lactose Intolerant Folks
For those who are lactose intolerant but love yogurt, you can use lactose free milk. Another way of getting a higher quantity of lactose out of the yogurt is by straining it and getting Greek yogurt.
The final and surefire way of having yogurt that is totally lactose free is by incubating the yogurt for 15 hours. Note that although this yogurt would be completely lactose free, it would also be very tangy
Testing For Doneness
Yogurt made in an instant pot is expected to be done in 8 to 10 hours depending on the thickness and tanginess desired (that is called the incubating period). But note that incubating for more than 10 hours would have diminishing effect.
The yogurt would start to thicken in three hours but it’s not advised that you start checking it at that point unless you want very light yogurt. You can start checking at about 6 hours; when you do, ensure that you use a clean spoon each time and do not stir the mix.
Just dip the spoon in the yogurt and bring out. You would loosen the yogurt and make it thinner or clump it if you stir.
Cooling And Storing Finished Product
When your yogurt is done, it’s best to chill it overnight in the inner pot or refrigerate for a minimum of 4 hours. Note that the yogurt would thicken more during the cooling process.
Storing your yogurt in individual size airtight containers makes for ease of serving. You can also store in a large container; just ensure that the container is airtight.
Saving Some Yogurt For Future Use
You can save some of your prepared yogurt to use as starter the next time you make your instant pot yogurt. But be sure that it is plain and unflavored.
One easy way of saving yogurt for future use is by freezing some of the fresh yogurt you just made. Pour some of the yogurt into an ice cube tray and freeze. This would help you know the exact quantity to use the next time because each ice cube cavity hold 1 tablespoon of yogurt.

Common Mistakes To Avoid When Making Instant Pot Yogurt
Not Using The Right Yogurt Starter
It’s funny that you have to use yogurt to make yogurt right? Well, that’s just the way it is! Bear in mind the type of yogurt starter you use would determine how your yogurt would turn out.
If you are using store-bought yogurt starter, check the label for ingredients listing. Ensure that it has active bacteria l cultures or live bacteria listed as one of the ingredients.
If you are using prepared / already made yogurt, make sure that the yogurt is plain and not flavored or sweetened.
Finally, bear in mind that the taste and texture of your end product can be affected by the type of live cultures in the yogurt starter. For this reason, it would be advised that you note the brand of yogurt starter that results in the taste and texture that you like best so that you can stick to it.
Not Using The Right Quantity Of Yogurt Starter
Some people think that they can eyeball the quantity of yogurt starter to use. Not so! The yogurt starter contains the bacteria that ferments the milk and turn it to yogurt.
If you use too little starter, the yogurt would not ferment well and therefore would be runny. If you use too much, the milk would ferment too much and becomes more acidic than desired.
So using the right quantity of yogurt starter to milk is essential. Always follow your recipe strictly as a newbie. Then as you progress in your yogurt making abilities, you’ll have gotten the exact quantity of starter to use for any volume of milk.
Not Using The Right Type Of Milk For The Right Method
The cold start and boil start methods of making yogurt in an instant pot calls for different kinds of milk and we have explained this at the beginning of this post. Ensure that you do not ignore the type of milk that your recipe and method calls for. If you do, you would not get the desired result.

Adding The Yogurt Starter To Hot Milk
Some people make the mistake of adding the yogurt starter to hot milk. Don’t do that! if you add your starter to hot milk, it would kill the bacteria that is meant to be introduced to the milk.
This is why you should adhere strictly to the temperatures stated for both boiling the milk and cooling it. Do not be in such a hurry that you add the yogurt starter before the milk cools to the right temperature which is between 105 to 115 °F
Opening The Instant Pot Or Moving It While The Yogurt Is Incubating
Do not be in a hurry or anxious to see your homemade yogurt that you open your instant pot before time. The minimum time that you can start checking your instant pot yogurt is 6 hours.
Also ensure that you keep your instant pot in a spot where you;ll not have to move it once the incubation period starts,
Either opening the lid of the instant pot or moving it would disrupt the process of fermentation and you wouldn’t get the perfect homemade yogurt.
How To Fix Some Yogurt Making Fails
Different Probable Causes Of Yogurt Making Fails
There are so many reasons why your yogurt making expedition might end up in failure. If you have paid real close attention to the forgoing discussions you would have picked up on some or all of the reasons. These reasons include but are not limited to the following:-
- You may have miscalculated the temperature of heating the milk and cooling it. This applies to the ‘boil’ method of instant pot yogurt. Remember that when it comes to yogurt making , temperature is a major factor.
- You may have put in an add-on ingredient that tampered with the activity of the bacteria in the mix.
- You may have used the wrong type of milk.
- The quality of your yogurt starter was bad or you used the wrong quantity.
- You may have neglected to sterilize your instant pot.
Like we said at the beginning, making yogurt is a venture that is well thought out; you make out time for it. It is not an endeavor that you embark upon on a whim. If you ignore any of the steps no matter how insignificant it seems, you might end up with an undesirable outcome.
Now let’s assume that the deed has been done and you have an end product that you don’t recognize(nothing like the yogurt pictured below(lol)), do you now throw out the whole batch of milk? Maybe not, except in cases where the milk has gone bad and you can ascertain that it would be harmful if ingested.
Here are some things you can try to salvage your ingredients.
Runny Yogurt
If you use too little yogurt starter or your yogurt starter has stayed too long after you opened it. The end product would be too runny but you can do the following after you’ve tasted it to confirm that it tastes like yogurt but is not as thick as desired :-
Place a cheese cloth on a mixing bowl or the inner pot of your instant pot and pour the runny yogurt into cheese cloth and leave to strain. You can either leave it to strain out of the fridge for a few hours or place it in the refrigerator.
That said; ensure that you don’t keep your yogurt starter for too long. Frozen homemade plain yogurt may be good for 6 months. But store-bought yogurt starter should not be kept f or too long. It is best to use freshly opened yogurt starter.
When You Add Too Much Starter
Adding too much starter in your milk can make it curdle and yield whey and cheese. You can just go ahead and complete the process off cheese making and use the whey for smoothies or other recipes. We don’t have the time and space to explain (sorry) but you can look it up online. All we are telling you is that you don’t have to throw out your ingredients!
The Yogurt Didn’t Set After The Incubation Period
You come back to your instant pot excited to lift the lid and behold your thick and creamy homemade yogurt. But upon opening the pot, all you can see is a warm pot of milk! What happened? We may not be able to tell you what went wrong but here’s what you can try:-
- Reheat the milk to 110°F
- Add a fresh quantity of yogurt starter(ensure that it is not from an old stash; that might have been the reason why the yogurt didn’t set/ferment in the first place).
- Let it incubate for another minimum of 8 hours.
A number of people have tried this and were able to salvage their ingredients and end up with a perfectly smooth, thick and creamy yogurt.
If you do not have the patience to try the above methods of salvaging a failed yogurt making attempt, you can use the milk, runny or curdled yogurt for other recipes. All you need is to be resourceful. Remember that mistakes are also great learning curves. Some of the great recipes we are enjoying today came about from mistakes.

Conclusion
There’s so much to be said about how to make yogurt in an instant pot. We have tried to share as many things as we can remember that would help make your yogurt making in an instant pot a rewarding adventure.
However as we said earlier, do not be afraid of making experimenting and failing. You’ll be amazed at the unexpectedly wonderful things you would have learnt in the process
Let’s leave you with the two videos below for more inspiration:-